
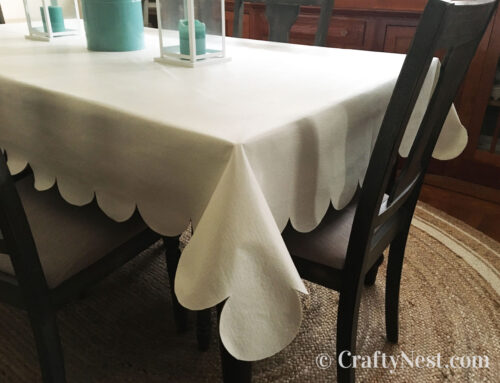
Fabric + pom-pom trim = DIY tablecloth

I own blue and white dishes. Normally this isn’t a problem — until I try to find a cute tablecloth that looks good with my dishes. Apparently, blue as a kitchen or dining color has been out for several seasons. The market is flooded with red, green, and aqua.
Instead of waiting for blue to come back in, I took matters into my own hands. First I checked the standard tablecloth size for my 36- x 60-inch table. Turns out, a 60- x 84-inch cloth fits tables 36 x 60 to 48 x 72. Then I found this lovely blue indoor/outdoor fabric at Fabric.com. At 56 inches wide, I figured it would work fine because my table was on the smaller end of that range. After that, hemming the fabric and adding pom-pom trim was a cinch. Final dimensions (pom-pom to pom-pom): 57 x 81 inches.
How to make a tablecloth with pom-pom trim
SUPPLIES
TOOLS
INSTRUCTIONS

1. First cut a clean edge at one end of the fabric. Measure 83½ inches and cut the other side.

2. Fold over the two long edges ⅝ inch twice, so the raw edge of the fabric is tucked underneath. Iron it flat and pin in place. Repeat on all four sides.

3. Sew about ⅜ inch from the edge. Back-stitch at the ends. Don’t sew farther away from the edge because your stitching will show above the pom-pom trim. Repeat on all four sides. For neatly flat mitered corners, follow the directions here.

4. Apply Aleene’s Stop Fraying to the end of the pom-pom trim before sewing. Sew using a zigzag stitch down the middle of the pom-pom trim. Make sure you cover your original seam. Back-stitch at the ends.

5. Cut the pom-pom trim to the right length after you have sewn to the end.

6. Apply Aleene’s Stop Fraying to the end. I used Krazy Glue instead because it’s what I had on hand. I don’t recommend it because it dries stiff and makes the threads translucent. Repeat steps 4-6 on all four sides of the tablecloth.

7. If your layers are getting too thick at the corner to sew in your machine like mine did, abut the ends of the pom-pom trim at the corner instead of overlapping it.

8. Now iron your tablecloth again, if necessary, and you’re done.

Share this story
Reader Gallery
Made this project? Email your photo(s) to monica (at) craftynest (dot) com, and I’ll share your version here!
Leave A Comment