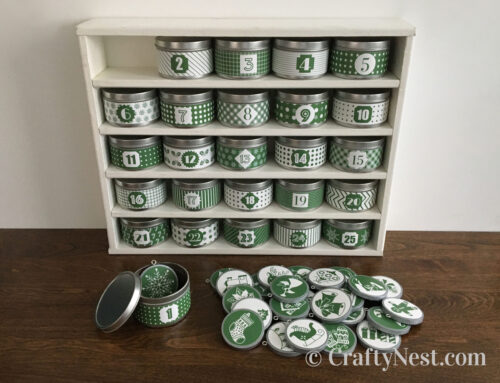
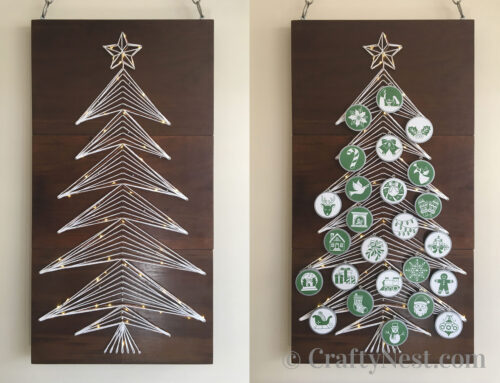
I could hardly wait to show you this Popsicle stick craft! These snowflakes are fun, easy, and so inexpensive to make. The smallest snowflake is 12 inches across; the largest is 24 inches. I had some rhinestones left over from my Christmas tree advent calendar, so I glued some at the tips of each white snowflake. You could also coat them in glitter or fake snow. And why stop with snowflakes? You could make stars, wreaths, or Christmas trees decked with lightweight ornaments. Hang them in your window, over a door instead of a wreath, or from the ceiling.
Supplies and tools
All my snowflakes are based on three basic patterns, which I will call star, hexagon, and rotated hexagon.
1. Start by gluing six craft sticks in an asterisk shape at 30 degree angles. Use a protractor to make sure your angles are accurate.
2. Then add the points to the star.
3. Finally, depending on the pattern, add the final craft sticks to complete the snowflake.
1A. Start by gluing six craft sticks in an asterisk shape at 30 degree angles. Use a protractor to make sure your angles are accurate.
1B. For the mini hexagon, start with three craft sticks instead of six.
2. Add more sticks to expand the lengths.
3. Glue six sticks in a hexagon shape, then glue each point of the hexagon to your asterisk shape.
4. Finally, depending on the pattern, add the final craft sticks to complete the snowflake.
1. Start by gluing six craft sticks in an asterisk shape at 30 degree angles. Use a protractor to make sure your angles are accurate.
2. Glue six sticks in a hexagon shape, then glue the middle of each side of the hexagon to your asterisk shape.
3. Finally, add the final craft sticks to complete the snowflake.
1. Using a small paintbrush, paint two coats of paint on each side, including the edges. I recommend spray paint instead because it’s easier and faster, but severe weather prohibited spray paint in my case. Let dry.
2. Glue rhinestones onto the tips of the snowflakes. Or glue on glitter or fake snow. Let dry/cool.
3. To hang them in the window, tie fishing line to each snowflake. Tape the fishing line to the top of the window frame with clear cellophane tape.
4. To hang them on the wall, tie a small ribbon bow to the snowflake, then tie a longer piece of ribbon to the back of the bow. Attach the long ribbon with double-stick foam tape at the very top of the wall.
RSS feed for comments on this post · TrackBack URL
“Have nothing in your homes that you do not know to be useful and believe to be beautiful.” -William Morris (1834-96)
December 8, 2009 at 9:18 am
these are awesome!! I am so making these with my kids tonight!
December 8, 2009 at 9:21 am
how fun! I spy a project for my son & I this weekend:)
December 8, 2009 at 9:25 am
This is perfect timing…my son is learing about snowflakes this week in preschool. I think these would be a fun after school project!!
December 8, 2009 at 9:37 am
I love this! They are easy to make and cheap and look absolutely fabulous! Thanks for sharing!
December 8, 2009 at 5:14 pm
Well now I know what I’m making tomorrow!!! What a great idea! Thank you!
December 8, 2009 at 7:05 pm
These are really fantastic. Great job. They look amazing.
December 8, 2009 at 8:40 pm
I LOVE LOVE LOVE this!
December 8, 2009 at 11:00 pm
these are sooo cool
blessings
barbara jean
December 8, 2009 at 11:18 pm
Wow! Finally something I can do with all my craft sticks. I have hundreds.
Thanks for sharing.
December 9, 2009 at 4:15 am
This is such a cool site great ideas clean and neat not over the top
December 9, 2009 at 7:34 am
Love these! They’re so simple but so striking. Absolutely fantastic.
I’m going to include this in my Sunday blog roundup. Thanks so much for posting this.
December 9, 2009 at 8:49 am
so awesome. i just love how they’re big, but not fussy at all. so minimalist. so lovely!
December 9, 2009 at 11:54 am
These turned out great! Love the idea and how simple, yet dramatic they are.
December 9, 2009 at 12:05 pm
I love these! I I may have to try making them with my toddler. Thanks for sharing!
December 9, 2009 at 3:57 pm
What a fun idea! thx!
Giant Craft Stick Snowflakes · Lesson Plans @ CraftGossip said,
December 10, 2009 at 11:23 am
[...] or trigonometry, or symmetry…this is great and they look fabulous too! Head on over to Crafty Nest and find out how to make various different shaped [...]
December 10, 2009 at 9:04 pm
Thank you so much for posting this!! I’m so excited to try it, these really are beautiful!
December 11, 2009 at 1:25 am
so awesome!
Feature Friday – Giant craft stick snowflakes | Chica and Jo said,
December 11, 2009 at 8:19 am
[...] I have started making a list of things I want to do for next Christmas. High on this list are the giant craft stick snowflakes I saw over on Crafty Nest. We featured Monica’s blog last January when Chica fell in love [...]
December 11, 2009 at 3:03 pm
I want these ALL OVER my walls. All winter long. What a great idea!
Цікаве за тиждень. Випуск #47 | Зроби Сам(А) - тільки саморобне. Листівки, ви said,
December 11, 2009 at 10:55 pm
[...] Giant craft stick snowflakes – велетенські сніжинки із дерев’яних паличок; [...]
Make Giant Popsicle Stick Snowflakes | My.BuzzCritic.com said,
December 12, 2009 at 3:16 am
[...] this tutorial over at Crafty Nest [...]
Christmas Decorations Day 9 « I had a thought… said,
December 12, 2009 at 7:03 am
[...] then I clicked through to the originating site with instructions (www.craftynest.com) and saw [...]
December 12, 2009 at 8:59 am
I am including this post in my Inspire My Saturday feature. Thanks so much for sharing. I love this idea.
XO*Tricia
December 13, 2009 at 5:14 am
Those are cute!
Christmas Deco « Paths of Life said,
December 13, 2009 at 7:10 pm
[...] 7. Enfeite com flocos de neve gigantes, usando o palitinho do sorvete que tomou na praia. Por craftynest. [...]
tifi said,
December 14, 2009 at 1:49 pm
[...] Helped Wren and Finch make these and supervised Robin doing this. [...]
December 14, 2009 at 4:34 pm
always looking for holiday decor ideas–these are a fave so far.
December 14, 2009 at 7:06 pm
You are so clever! I LOVE these!!!
Daily Digest – Collected Links and Activity December 14th | Snow Fox Creations : The Blog said,
December 14, 2009 at 9:41 pm
[...] Shared Giant craft stick snowflakes. [...]
my view « ……………………………………………………. said,
December 16, 2009 at 11:43 am
[...] days now. I feel much better now. I gazed at our popsicle stick snowflakes we made on Monday using this tutorial. I have to admit I didn’t read the tutorial. I saw a picture of a protractor and [...]
December 17, 2009 at 4:22 pm
My 5 year old daughter and I made one of these lastnight and gave it to her teacher today for Christmas. She went on and on about how she could hang it up on her door, not just for Christmas but all through the winter season. Besides that, my daughter loved the personal time we had together assembling and painting. You can see a picture of our end product on my blog. Thanks Monica for the project!
December 18, 2009 at 2:22 pm
Super pretty. I have giant snow flake lights this year, and they look so good.
December 20, 2009 at 12:53 pm
uh oh, I teach k-6th grade art and I have an entire box of these….
wheeee! thanks fr the idea!
December 21, 2009 at 12:26 am
That is so cool! I want to play with Popsicle sticks! Thanks tons for this, I’ll be linking.
December 21, 2009 at 6:26 am
Fabulous. I will be adding you to my reader-you are one crafty gal.
Cheri
December 25, 2009 at 9:07 pm
I LOVE this!! Especially since I bought a box of 1000 popsicle sticks in the clearance section of the craft store last week for $2 – score!! : )
Dondurma Çubuklarından Kar Taneleri « creative food art said,
December 31, 2009 at 5:33 am
[...] işte burada [...]
January 6, 2010 at 10:50 pm
Instead of using a protractor, it is much easier to print out a cirlce with radians on it and use that as a guide. Similar to the one seen here: http://digitaldestruction.net/precalc/graphics/radians__5.png
You just have to line the sticks up and it was super fast and easy this way. Cute idea! I got lots of compliments and I didn’t even paint mine!
January 8, 2010 at 4:23 pm
Veronica – Genius. Thanks for sharing.
Different by Design » Blog Archive » Craftynest said,
January 21, 2010 at 3:34 pm
[...] I love these Popsicle snow flakes, find the tutorial here. [...]
February 4, 2010 at 1:57 pm
I just spotted these and love what you’re doing here. And I also love… this chair!! Where did you buy it??
March 23, 2010 at 8:09 am
I really really like that! I’ll definitely keep it in mind when I decorate my apartment for the upcoming Christmas! Thank you for the great idea!
April 5, 2010 at 9:43 pm
LOVE!!! i wish it were winter again
April 6, 2010 at 10:38 am
that’s awesome honey..
if I’m L.Ann,these are so wonderful ‘n I liked them =)
April 6, 2010 at 10:40 am
N’
you’re so creative if you make them.
you know I love ice-cream?
;)
Hey Friends.
Love from NY..
Lac.Ann.McD.
Summer Vacation is Great! If Going Insane Is Great. | Queen of Shake Shake said,
June 25, 2010 at 9:06 am
[...] actually lying, which insane people happen to do quite often. I erased the line when I discovered this popsicle stick craft. I’m going to make those motherfuckers in time for [...]