
DIY recycled Christmas card advent calendar

Remember when I told you three years ago that I was going to make an advent calendar the same way I made my hanging postcard collage? Well, I finally did it! Apologies for posting so late in the season. You probably already made or bought an advent calendar this year. But you can start saving Christmas cards to make one next year. The beauty of this design is that it rolls up and stores easily to be used year after year. (This post contains affiliate links. If you use these links to buy something, I may earn a small commission. You can read my full disclosure here.)

Slip a thin, wrapped piece of chocolate (Ghirardelli Squares work well) or note behind each card for a daily Christmas treat. I cut out a square from the inside of each card, including the giver’s signature, and pasted it on the back so I will always remember who gave that card to me. You could also decorate the cards with glitter, brads, eyelets, ribbon, etc. All you scrapbookers know what I’m talking about.

I’ve saved virtually every greeting card ever given to me, so I only had to raid my box of cards to make this advent calendar. I know, that screams hoarder, doesn’t it? But I keep them neatly organized in photo boxes on my shelf. No scary, chaotic mess here. I even have a birthday card my parents gave me when I was two years old. Though I can’t imagine why anyone would buy a greeting card for a two-year-old.
But wait, there’s more! Save your card scraps and use your paper punches to make Martha Stewart’s Holiday Card Ornaments or Recycled Card Ornaments.
How to make a recycled Christmas card advent calendar
SUPPLIES
TOOLS
NUMBERED CARD INSTRUCTIONS

1. Using a craft knife and metal ruler, cut a 3½-inch square window in the middle of a piece of black card stock.

2. Find the best part of the card within that window, trace the inside edge with a pencil, and cut along your pencil mark.

3. To remember who gave you each card, use your window to cut out a portion of the inside of the card (including the signature). Glue that square to the back of your card. This also adds thickness and stiffness to each card.

4. Arrange the cards in the order you want them to appear.

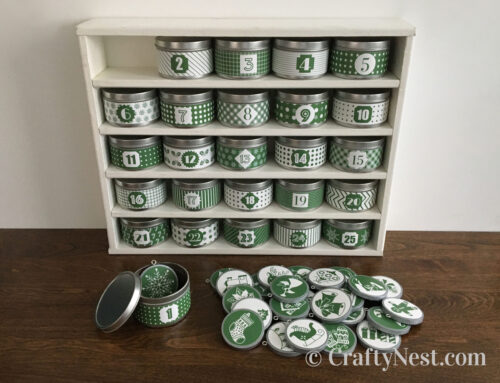
5. Print out the advent calendar numbers. Punch out each one using the 1¼-inch paper punch.

6. Punch 25 circles out of the red card stock using the 1½-inch paper punch.

7. Glue the smaller circles to the larger circles. Or, if your white card stock is adhesive-backed, simply peel and stick.
CALENDAR FRAME INSTRUCTIONS

1. Using a miter box and pull saw, cut the trim into 24-inch pieces. Then sand the rough ends smooth.

2. Prime and paint. I painted one coat primer, two coats paint. Or leave the wood natural.

3. While the paint dries, measure, mark, and cut your fabric. I cut mine 25¼ inches wide (24 inches plus ⅝-inch seams on either side) by 21 inches tall (you will trim off the excess).

4. Fold and iron the side seams flat. This makes it easier to sew. Sew both sides about 3/8 inch from the edge.

5. Fold the bottom edge ⅝ inch and iron. No need to sew this edge because it will be stapled down. When the paint is dry, staple a trim piece to the bottom edge of your fabric. Place a staple every few inches. Keep the staples parallel with the wood, and keep them as close to the center as you can.

6. Measure 3 inches between each trim piece (the wood will overlap the postcards about ¼ inch). Staple once at each end of the wood, then check the front to make sure it’s straight. Continue stapling every few inches.

7. Repeat for all but the last piece of wood.

8. When you get to the last piece, measure the 3-inch-space as usual, then fold over the excess fabric and staple the final piece along the top edge. Trim the excess fabric.

The front should look like this.

9. Fold your ribbon at an angle and staple it to the top of your advent calendar frame.

10. Insert the cards into the advent calendar frame. Space them about one inch apart.

11. Peel and stick the red numbers onto the cards (or glue them if you don’t have adhesive card stock).
Note: It looks best if the number is placed in relatively the same place on each card. Keep that in mind when you are cutting out your card designs. You don’t want the best part of the card to be covered up with the number.

12. Use a 3M hook to hang your advent calendar temporarily for the holidays.

Share this story
Reader Gallery
Made this project? Email your photo(s) to monica (at) craftynest (dot) com, and I’ll share your version here!


Leave A Comment