
DIY woven wine-cork trivet with loop hanger

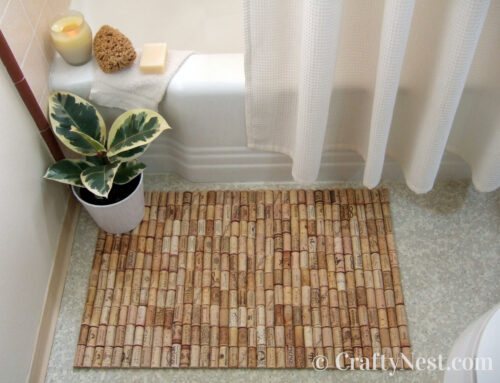
Ten years ago, I made a bath mat out of wine corks. It took 175 corks, but I still had tons of them left over. No, I didn’t drink a ton of wine. In fact, I don’t drink alcohol at all. I gathered them from Sunset wine tastings. I saved the corks for so long because I had plans for them. For one, I wanted to make a doormat by weaving the corks together with twine. Well, I decided to try it on a smaller scale first.

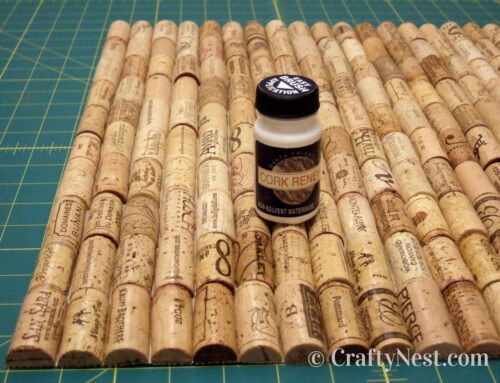
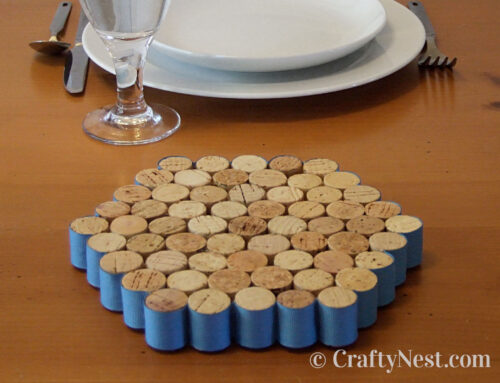
My first wine-cork trivet was assembled entirely with hot glue. This wine-cork trivet is sewn together with hemp string. In fact, corks, hemp string, and a few dabs of craft glue are all it’s made of. It’s a fairly easy project too, as long as you have the right power tools. Other than a drill, you don’t need power tools to do this project, but it does go faster. Cork is bark from Cork Oak trees, so you can saw it, sand it, and drill it just like wood.

The hardest part (for me) was figuring out how to add a sturdy loop from which to hang the trivet. After a little braiding and wrapping, I finally figured it out.

I love the natural look of it. The neutral cork color and organic texture go with just about any decor. The winemakers’ logos and typography add an interesting touch. And cork is a great insulator, which makes it a perfect material for a trivet or hot pad.

I also love how my cute little white teapot looks on it. I’m an extremely finicky tea drinker. I won’t touch chamomile — yuck. My favorite tea by far is honeybush herbal tea. Anyway, this turned out well, and I still have wine corks left, so I may attempt the doormat and/or a few more trivets.
How to make a woven wine-cork trivet
SUPPLIES
TOOLS
INSTRUCTIONS

1. Other bloggers say that either boiling or steaming corks before cutting them with a kitchen knife is the easiest method. While I wanted to try one of those methods myself, my husband insisted that it was easier to cut them exactly to size with a miter saw — and he volunteered to cut them for me. I couldn’t argue with that. My corks were all about 20 mm wide, so he cut each of them into two 20 mm-long pieces. To get a consistent length, he clamped a piece of wood to the saw as a guide. We discarded the end where the wine had stained the cork.
Note: Using a miter saw to cut corks can be hazardous if you don’t know what you’re doing. If you’re a novice at power tools, I recommend trying one of the other methods to cut cork. And you might notice that the blade guard is missing on my miter saw. That recently broke. We bought a replacement since this photo was taken.

2. The miter saw leaves a raw edge. I used a palm sander with 220-grit sandpaper to make the cut edge as smooth as the outside edge of the cork. I firmly gripped the cork in my hand and held the rough edge against the spinning disc for several seconds until it was smooth. You can sand it manually with a sanding sponge instead. It will just take longer and require more effort.

3. My husband stepped in to help again when I told him I needed to drill two holes in each cork. He made a wooden jig, clamped it to a drill press, and drilled each cork down the middle. One hole lengthwise, and one hole crosswise using a 9/64-inch drill bit. The hole had to be that big in order to feed string in two different directions in the middle. You don’t have to use a drill press. If you have a steady hand, a standard drill will work just fine.

4. I cut a 4-yard length of hemp string. To stiffen the hemp enough to easily string the corks, I smothered 4-5 inches at one end — including the tip — in Elmer’s glue and let it dry. It took a couple hours to completely dry.

5. I tied the other end of the string to the first cork (through the crosswise hole) and pulled the knot as close to the cork as possible.

6. I then strung the second cork through the lengthwise hole with both strands of string.

7. I pulled the string firmly until the knot got sucked into the hole on the second cork. Then I cut the excess string from the short tail, leaving the long string.

8. I continued stringing all the corks in an alternating pattern: lengthwise, crosswise, lengthwise, crosswise, etc.

9. I loosely arranged the stand of corks into an 8-by-8 square pattern by zig-zagging the strand back and forth like a snake.

10. I ran the string through the opposite hole in each cork, one row at a time, starting with the last row of corks that were strung. I was essentially repeating the snake-weave pattern in a perpendicular direction. I kept the shape fairly loose at this point so it was easier to get the string through each hole.

11. After I sewed through every hole, I tightened each section of string until the entire trivet was tightly and evenly bound.

12. I cut another strand of hemp about 20 inches long. I used a half-hitch to tie it at the middle to the longer thread that I used to sew the trivet. I tied it as close to the cork as I could.

13. I then braided the three strands of hemp together for 3-4 inches. This will become the loop. Braid yours as long as you want the loop to be.

14. I tied a half-hitch knot at the end of the braid.

15. I trimmed the two short ends to less than an inch and coated them in glue to stiffen them. Then I waited a couple hours for the glue to dry.

16. I shoved the two short ends into the hole of the cork (making a loop out of the braided section) and wrapped the long string tightly around the knots at the base several times. The last few inches that I wanted to wrap I generously covered with glue before I finished wrapping it around. I trimmed off the non-glued part, smoothed down the glued end, and wiped off the excess glue with my fingers. I waited a couple hours for the glue to dry, then the trivet was done and ready to hang or use.

Share this story
Reader Gallery
Made this project? Email your photo(s) to monica (at) craftynest (dot) com, and I’ll share your version here!
I really want to try this. I’m a little confused when you took the 20 inch piece of hemp and tied it to the middle?