
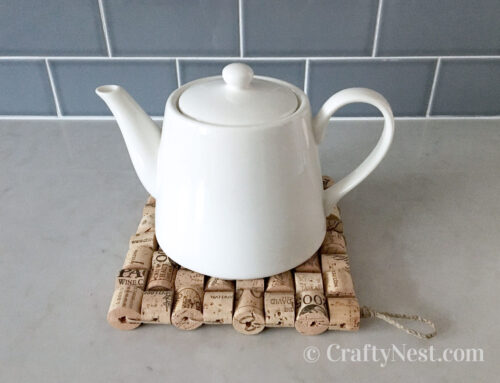
DIY wine cork trivet

My sister Christy came up with this super easy idea, and I love it. Even better: I had all the supplies on hand. No, I don’t drink wine, but I have plenty of friends who do. They saved their corks for a big project I have planned. I could spare a few for this trivet. You can make these any size or shape you want. They’d also be great as coasters. You can also make a wine-cork trivet by sewing together the corks with string.

How to make a wine cork trivet
SUPPLIES & TOOLS
INSTRUCTIONS

1. Cut each wine cork in half with the kitchen knife. Try to cut as close to the middle as possible, so each will be the same height.
UPDATE: Several Pinterest pins have informed me that there’s an easier way to cut wine corks. Curb Alert swears that steaming wine corks on the stove for a few minutes makes them as easy to slice as butter. Check out their tutorial here. I have to try it!

2. Sand the rough edges smooth and even out the height, if necessary.

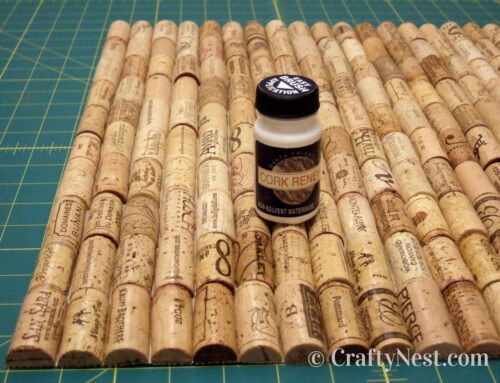
3. Arrange the wine corks in your desired pattern.

4. Flip all the corks over, then start by gluing the center line together. A thin line of glue along the side is sufficient.

5. Then glue more corks, one by one, onto that center line until they are all glued together.

6. Start gluing the ribbon to the outside edge of the trivet. Squeeze a thin line of glue between each cork (one at a time), and then press the ribbon into the crevice. Let the last line of glue cool a bit before gluing the next (so you can pull the ribbon tight).

7. When you reach the end, trim the ribbon, apply the final line of glue, and press the end into the crevice.

8. Pick off the inevitable hot glue strands, let it cool, and you’re done.

Share this story
Reader Gallery
Made this project? Email your photo(s) to monica (at) craftynest (dot) com, and I’ll share your version here!

My sister Christy sent me this picture of her friend’s wine cork trivet.
I love this idea and by using ribbon to finish it off, I can color-coordinate my trivets to my dining room! I do drink wine and have hundreds of corks that I’ve saved over the years — I can’t wait to make my trivets!!
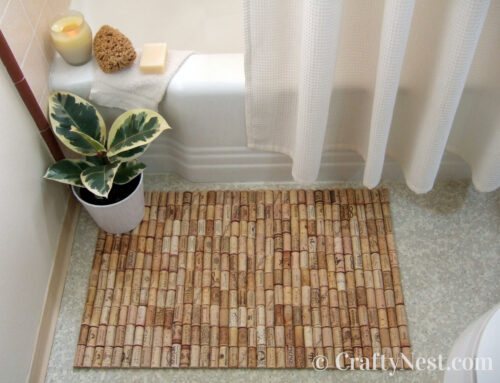
I think it would be easier to use an electric knife to cut the corks in half ..just my opinion .I love the trivet and I probable have a few thousand corks ….No I didn’t drink all that wine I got most of my wine corks at garage sales ,,,Really cheap …anyway I am going to make me one or two of those trivets ,,,plus I want to make me one of those mat’s to step on when you get out of the shower …..I love that mat …thank you for posting the trivet directions …