
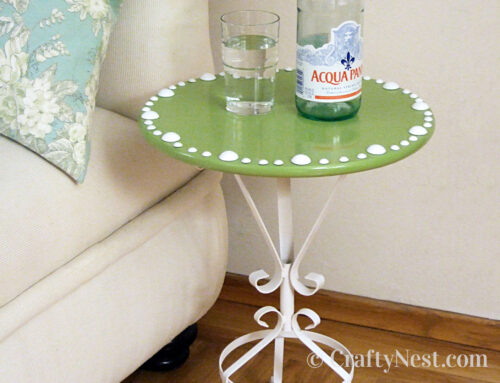
DIY silver stenciled library side table

I love metallic-finish furniture, and I thought this little library table was the ideal piece to try my own metallic finish. I bought the table on Craigslist last year for $15. I adored its cute shape, but it needed lots of repairs. I pulled 21 (mostly bent) nails out of this thing — and filled twice as many holes. A few coats of shiny silver paint and a handmade stencil gave it an instant update. Like the stencil? Download the pattern to make your own. The design is based on an original Orla Kiely pattern. Check out her fabulous signature bags here. And the pink books? I covered a few beloved paperbacks with coordinating 12- x 12-inch scrapbooking paper. (This post contains affiliate links. If you use these links to buy something, I may earn a small commission. You can read my full disclosure here.)

How to make a silver stenciled library side table
SUPPLIES
TOOLS
INSTRUCTIONS

*Please see the note at step 7.
1. First, disassemble and repair the table you are refurbishing. For me, this required pulling out lots of nails and gluing some broken pieces.

2. Fill holes and nicks with wood filler, then let dry. Sand smooth with fine sandpaper. Remove dust with a tack cloth.

3. Paint two coats of primer. Let dry at least 15 minutes after each coat.

4. Spray 2-3 coats of silver spray paint, letting dry about 20 minutes between coats. Let dry overnight.

5. Download the stencil here. Don’t like my pattern? You’ll find some more free stencils here. Print it out, then attach it to a stencil board with spray adhesive.

6. Using a utility knife and a self-healing mat, cut out the stencil. It’s easier and more effective to turn the stencil, not the knife, when you cut round shapes.

7. Spray a light coat of adhesive on the back of the stencil, and let dry a minute or so. Or you can use stencil adhesive. Adhere the stencil in place. Using a fairly dry paintbrush, apply paint to the stencil in a thin coat. The stencil tends to bleed slightly, so immediately remove the stencil and paint a thicker coat of paint by hand, smoothing out the bleeds as you go.
*Note: The instructions above are how I did it, but I think there’s a better way. After step 3, spray a couple coats of white paint in the general area where you’re going to stencil, then skip to step 5 and 6. Trace the stencil onto Con-Tact paper and cut it out. When the paint is dry (I’d give it 24 hours), remove the backing and adhere the Con-Tact paper stencil onto the table. Continue with step 4, then peel off the Con-Tact paper. (If you try this, please let me know if it works for you!)
8. Let the paint dry overnight before placing anything on it. All done.

Share this story
Reader Gallery
Made this project? Email your photo(s) to monica (at) craftynest (dot) com, and I’ll share your version here!


Leave A Comment