
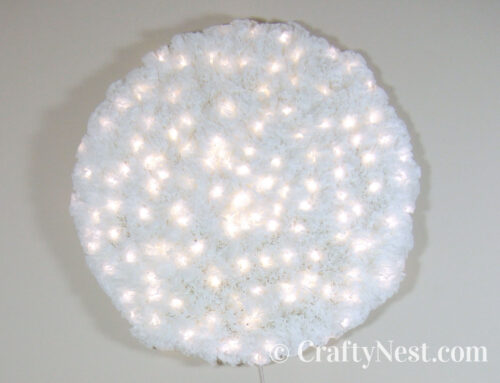
DIY bamboo orb pendant lights

Apologies for my long absence. A month ago I landed a full-time job (gotta pay the bills) along with a 3-hour round-trip commute. Ugh. It’s left little time for crafting. Not to worry, I’m still going to keep blogging, but it might be on a more infrequent basis. For now, it feels good to be back! I’ve missed you. I have three more camp crafts to show you, and I’m excited to share this year’s Christmas crafts, plus much more, so don’t give up on me yet. (This post contains affiliate links. If you use these links to buy something, I may earn a small commission. You can read my full disclosure here.)

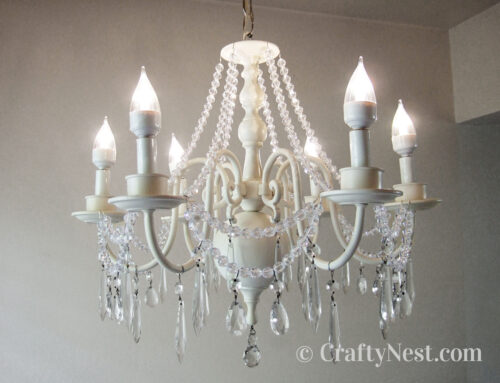
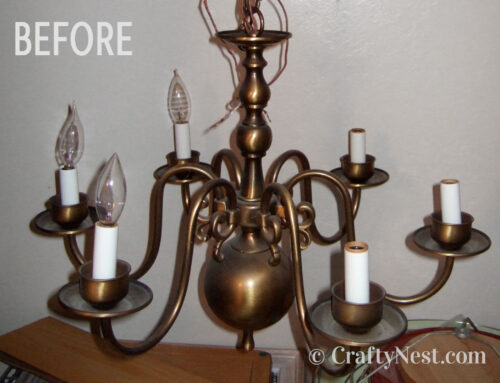
These bamboo orb pendant lights were inspired by the Cassiopeia chandelier (above) from Ironware International that I saw on the cover of the April 2011 issue of House Beautiful. And I noticed today in the latest Restoration Hardware catalog a similar one called Foucault’s Iron Orb Chandelier. While both of these are gorgeous lamps, their price tags are out of my reach. So, I made my own version using bamboo strips instead of wrought iron and a single CFL bulb instead of five candelabras.

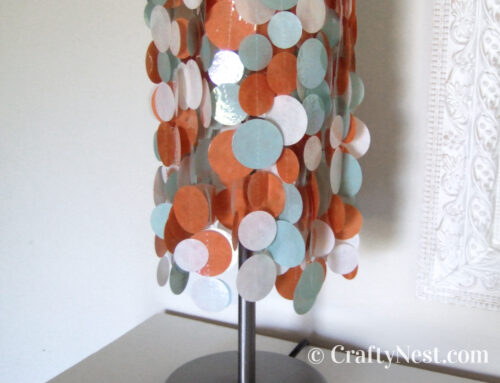
The bamboo for this project comes from an inexpensive bamboo roman shade, purchased from The Home Depot. The bamboo is surprisingly sturdy and bendable—and you can easily cut it with scissors—making it an ideal lightweight frame for paper lanterns or this orb lampshade. And you’ll have plenty of bamboo strips left over to make those paper lanterns that I blogged about last spring. I know I still owe you a tutorial. I’ll get to it eventually. One more thing: I found that shabby-chic trunk on the side of the road with a “free” sign taped to it. Score!

How to make bamboo orb pendant lamps
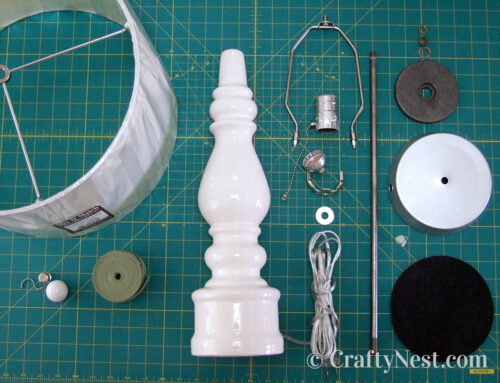
SUPPLIES & TOOLS
INSTRUCTIONS

1. Using scissors, cut the strings and unweave the bamboo slats from them. Discard the strings, hardware, and top and bottom pieces of the roman shade.

2. Apply wood glue to the last ½ inch of one bamboo slat. Curve the other end around in a circle and place the tip on top of the glue. Secure with a mini spring clamp. Let dry at least 2 hours. Repeat to make about 20 bamboo circles for each pendant light. Larger pendants may require more; smaller ones may need less.
Note: If you wish to make a larger lamp than your shade’s width allows, glue bamboo pieces together to form larger circles.

3. Starting with three bamboo circles, intersect them into the shape of an orb. The intersections should create an equilateral triangle. Apply a dab of glue at each tip of the triangle and clamp in place. Let dry at least 2 hours.
Note: The most time-consuming part of this project is waiting for glue to dry. If you’re in a hurry, I recommend buying at least 15 clamps. In a pinch (like my pun?), you can try using bulldog clips, binder clips, or barrettes. They work, just not as well as spring clamps.

4. Continue adding bamboo circles until you have used as many as you desire. Glue and clamp each circle to the orb in 2-3 places. Let dry at least 2 hours. Be sure to leave an opening somewhere that is big enough for a globe light bulb to pass through.

5. Screw the light bulb into the socket. Feed the plug end of the cord in through the large opening then out through a small opening on the opposite side. Pull all the way through until the top of the orb rests on the top of the light socket.

6. Hang the light, and flick the switch. You’re done!

Share this story
Reader Gallery
Made this project? Email your photo(s) to monica (at) craftynest (dot) com, and I’ll share your version here!
Would have been nice if you had made it so that people could print and save the directions. Instead, I bet I can find similar instructions somewhere else, and I won’t be back.
Hi Cynthia. I guess I’m sending this response out to the ether because you’re never going to read this. I suggest you do what I do: Save a tree. Instead of printing things you want to save, Pin them for later, and read them on your phone or computer when you’re ready to make the project.
Not sure what prevents you from copying and pasting the text into a word file and just printing that…
This HTML in this website (on my browser) prevents you from selecting text and right clicking to copy. Not a good (web) design choice.
The bamboo light orbs ARE a good design choice; hopefully I can find some shades similar to the article that are bendable.
PB – I agree that it’s not an ideal choice, and I didn’t make it lightly. I just got fed up with seeing my copyrighted content stolen and spread all over the web, so I locked it down. I may revisit that decision in the future. Thank you for your feedback. May I suggest you save the information they way I do? Pin it on Pinterest, so you can always find the article whenever you need it.
Love this! I’m looking to add a pendant light to our living room, but a ready-made one is not in the budget at this time. Thinking I’m going to give this much more affordable option a try…thank you for sharing!!
Hi Monica, I loved the idea when I came across it. Your website is free and yet someone still found a reason to complain! Keep up the great work
Great job with the lights. I just may try your idea. Thanks!
Love this just recently took off my bamboo Roman shade in my bedroom to put white blinds in my bedroom. My roman shade blind is still in good condition. I was looking for ways to repurpose it. This is perfect! Love it! Thank you ! For posting it!
I can’t find the bamboo Roman shades you suggested. Everything I find is plastic or a rally hard (not playable) bamboo ones. Can you send me a link for the ones you used for this project? Please and Thank you!
Jen B – Sorry, it’s been too many years since I made these lights. I don’t remember which bamboo shade I used.
Thank you for sharing, it’s a great idea and the explanation is very useful. I made small shades for my string of outdoor lights with some bendable branches I found during a hike and I used hot glue…I got burnt, but I’ll try your idea, I prefer to use glue and some bamboo it seems easier to work with.