
Crafting with the Cameo: DIY embossed numbers clock

Can you believe it? I finally took my Silhouette Cameo™ out of its box and fired it up last week. I seriously don’t know what took me so long. I have lots of projects I want to try, but I decided to start with this square clock idea that I had been hatching. (This post contains affiliate links. If you use these links to buy something, I may earn a small commission. You can read my full disclosure here.)

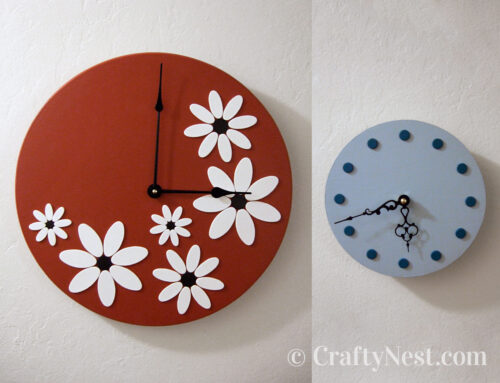
As soon as I saw the Embossed Numbers Wall Clock at Crate and Barrel (above), I wanted to make my own. It’s made by Karlsson, a Dutch clock brand. One of Karlsson’s best features is the chunky numbers that they use in many of their clocks. I couldn’t find a font to match, so I created my own pattern that’s close.
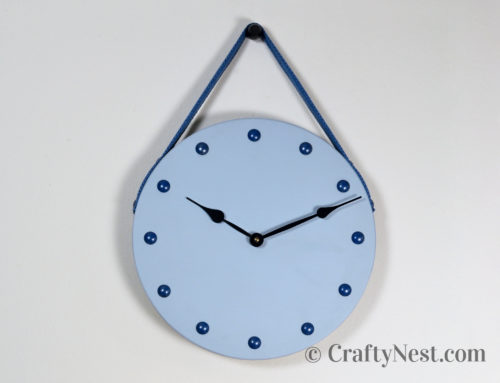
In addition to the numbers, I loved the white-on-white. My plan was to make my clock white too. But my friends are always encouraging me to break away from all-white-all-the-time, hence the orange. I admit that I like the bright color better than the all-white clock now.
With the multiple cut-paper pieces, I never would have attempted this project without my Cameo. If you’re not familiar, the Silhouette Cameo™ is an electronic cutting tool: easy to use, doesn’t take up much space, and cuts patterns perfectly. I bought the Silhouette Studio® Designer Edition software so I can import my own designs. Personally, I wouldn’t use the Cameo without the Designer Edition software. You’ll need it as well to make this clock, so…
Silhouette is offering a special deal just for Crafty Nest readers! Until Thursday, March 29, 2012, you can get the Cameo and the Silhouette Studio® Designer Edition for $269.99. That’s a screamin’ deal. And if you already own the Cameo, you can get the Designer Edition software for half off. Click “Read more” to find out how and get the discount code.
Here’s how you get the deal:
- Click this link: silhouetteamerica.com/blog-de-3.aspx
- Add the Silhouette Designer Edition bundle or just the Silhouette Studio® Designer Edition software to your cart.
- Enter the CRAFTYNEST promotion code.
- Order by Thursday, March 29 to get the discount!
I highly recommend the Cameo. I haven’t tried any other electronic cutting tool, so I can’t compare, but I’m impressed with it so far. The only aspect I’m disappointed in is the inability to cut thicker material. Case in point: This project would have been faster and easier if I could have used two layers of fun foam instead of 10 layers of paper. But when I tried to cut a sheet of foam with the CAMEO, it only cut about 1/3 of the way through—even on the thickest setting. I definitely think Silhouette needs to add foam sheets as an option. Can you imagine all the fabulous foam stamps we could make?!
I bought the Silhouette Studio® Designer Edition software mainly for the ability to open, manipulate, and cut .svg files, but it has other features:
- Rhinestone tools to convert designs into rhinestone templates and create your own rhinestone designs
- Sketch tools to convert designs into several styles of sketchable art
- Creative knife tools to allow you to clip designs using different patterns
- Enhanced eraser set to modify designs with more precision
- Built-in ruler and guide lines for precise alignment and drawing

How to make an embossed numbers clock
SUPPLIES
TOOLS
DOWNLOADS
INSTRUCTIONS

1. Download and import the .svg patterns (instructions here). Adhere a sheet of colored cardstock to the Cameo cutting mat. Cut the clock face pattern on your Cameo according to the instructions. Peel the cut clock face and extra piece off the cutting mat.
Tip: Adjust your blade to one number higher than the recommendation for your media. For example: medium cardstock says to set the blade at 2. I had better results when I set the blade to 3.

2. Do the same for the thin cardboard. Adjust your blade to 6.

3. Glue the cardboard clock face to the back of the colored clock face. Use the side of your X-Acto knife (remove the blade) as a brayer to smooth out the surface. Place heavy books on it to keep flat while it dries.

4. Using a ruler and bone folder (or the back end of a classic X-Acto knife), score the inside square of the clock face.

5. Fold the flaps up along the score lines. Then bend them back almost flat again.

6. Adhere another sheet of colored cardstock to the CAMEO cutting mat. Cut the clock numbers pattern on your CAMEO according to the instructions. Carefully peel off the negative pieces of paper from the mat, leaving the numbers behind. You can see in this photo that the edges look a bit rough. That’s because the blade was set at 2. It cut much better later when set at 3 (for medium cardstock).
Tip: You could use adhesive-backed cardstock to save some gluing time. However, adhesive-backed cardstock has a white core, so the sides of your numbers will be white. I didn’t like that look, so I went with regular cardstock and glue.

7. Use an X-Acto knife to gently lift the edge of each number. Keep the numbers in separate piles.

8. Glue the numbers front-to-back. Don’t glue one at a time—it will take forever. Apply glue to 2 or 3 pieces, then stack them together, press, wipe off the excess glue, then repeat. My numbers are 10 layers thick. You can save time by using fewer layers. Just remember, the taller they are, they bigger shadow they will throw, and the easier the numbers will be to see.
Tips: Use an X-Acto knife to wipe away excess glue from the edges. Keep damp and dry paper towels at hand to wipe of the glue from your fingers.

9. Starting with 3, 6, 9, 12, glue your numbers to the clock face. Place the numbers about ½ inch from the edge.

10. Use a circular object (I used a bowl) as a guide for placing the rest of the numbers in a circle. Make sure the numbers are evenly spaced between your 3, 6, 9, and 12. Glue them to the clock face.

11. Using wire cutters, snip ½ inch off the end of each clock hand. (I did mine in stages, and the pieces flew, which is why those remaining pieces are so small in the photo.) If you want white clock hands, spray them with a coat of primer, then a coat of paint. Let them dry for several hours—ideally overnight.

12. When the hands are dry, assemble the clock according to the directions that came with the movement.

13. Neither a second hand nor the supplied closed nut fit in this shallow picture frame (the clock won’t function correctly if the mechanism touches the glass). So, attach the open nut instead. Punch a ¼-inch circle of white adhesive-backed cardstock (or use my Cameo pattern to cut one) and adhere it to the top of the open nut.

14. Remove the back of the picture frame and picture mat. Insert the clock face into the picture frame, face down. Insert the battery and set the time with the hand set knob.

15. Trace the picture mat onto corrugated cardboard and cut out with an X-Acto knife. This is an extra spacer to keep the clock mechanism from touching the glass.

16. Insert the mat and cardboard. Replace the wooden back of the frame. Fold over the tabs. You’re done! Hang your clock on a wall, set it on a shelf, or place it anywhere you want.

Share this story
Reader Gallery
Made this project? Email your photo(s) to monica (at) craftynest (dot) com, and I’ll share your version here!
Leave A Comment