
The hats of Victoria: DIY paper silhouettes

This is the third and final post in my Victoria magazine series. As I mentioned in my last post, hats were commonplace in Victoria magazine. In fact, every issue included at least one woman wearing a hat. Below are some of Victoria’s many hat ladies.
I love high-quality simple straw hats in summer. When I lived in New York City, cozy felt hats were a must for winter. I especially love the big black fur hat, though I doubt I’d have the courage to wear it. It’s too bad we don’t wear hats much on the West Coast. Which one is your favorite hat?

Photo credits (left to right, top to bottom): Toshi Otsuki, Geoffrey Gross, Toshi Otsuki (3), Tom Hooper, Toshi Otsuki, Luciana Pampalone, Toshi Otsuki
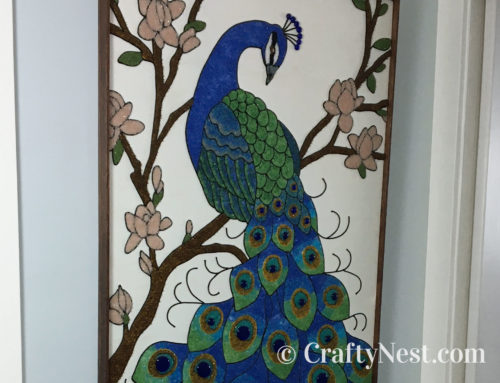
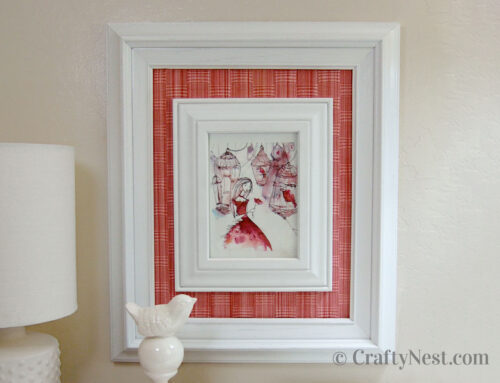
All those hats inspired me to make some paper art using their fabulous shapes. I titled my silhouettes “The Hats of Victoria.” All four are made from one of the Victoria hats pictured here. Can you find all of them?

Photo credits (left to right, top to bottom): Pia Tryde, Thomas Hooper (2), Barry Dunne, Stefano Massimo, Steve Randazzo, Toshi Otsuki (3)
I’ve included pdf downloads of all four patterns (plus a bonus hat pattern) for you to make your own paper hats. I thought it might be great to mix in other feminine accessories: sexy stiletto, small purse, bright umbrella, etc., so I might make another set if you’re interested.
This is the third of a three-part Victoria magazine series. The previous post included a Victoria-themed craft.
How to make The Hats of Victoria paper silhouettes
SUPPLIES
TOOLS
DOWNLOAD
INSTRUCTIONS

1. Print out 2-3 of each hat pattern. Download the hat patterns here. You can resize them as necessary to fit your frames.

2. Cut out the hat on one sheet, and the hat stand on another sheet.

3. Place the hat pattern on top of your decorative paper, and cut out both pieces of paper together. You might want to use smaller scissors for some of the intricate cuts.

4. First cut the hat, then the bow/band, then the inside of the hat. Then cut out your hat stand in black paper. There are two reasons to cut out the entire hat as one piece: (1) It’s easier to put all the pieces together in the end, and (2) It gives your art more of a three-dimensional look.

5. Make sure your paper isn’t too busy or doesn’t contrast enough. This was my first try, which turned out to be too busy.

6. Glue the pieces together. Use your third printout as a guide, if necessary. Only apply glue to the top part of the hat stand.

7. Trace the cardboard backing piece of each frame onto your background paper and cut out. Glue the hat to the background paper, if desired.

8. Insert the hat and background paper into the frame, and reassemble the frame. Don’t forget to clean the glass.

9. Hang your frames. For an easy way to get a perfect grid of frames the first try, check out my framed doilies post.

Share this story
Reader Gallery
Made this project? Email your photo(s) to monica (at) craftynest (dot) com, and I’ll share your version here!

Leave A Comment