DIY string-art Christmas tree with lights + free pattern

I finally made my first string art project! It was super fun and easy. Wait, nailing 101 nails perfectly straight — all at a precise height — is fun and easy? Yep! I’ll show you my trick to save you lots of time and save your fingers from getting smashed by the hammer (see step #9). I only hammered my finger once, but that was my fault. I wasn’t paying attention. (This post contains affiliate links. If you use these links to buy something, I may earn a small commission. You can read my full disclosure here.)

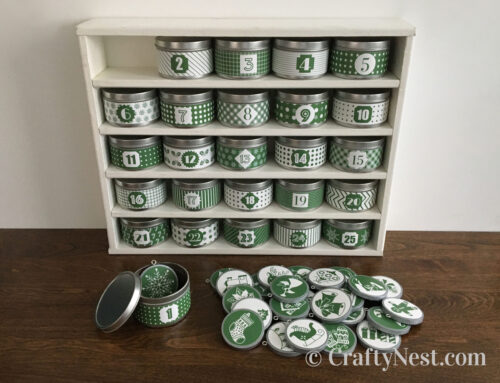
I designed this string-art Christmas tree so I had somewhere to hang the ornaments from my advent calendar. But you don’t have to make it an advent calendar. If you want a simple lighted string-art tree, just don’t add the extra nails for hanging ornaments. If you do want to make it an advent calendar, see my instructions here.

I wanted to make a tree to hang advent calendar ornaments, but what’s a Christmas tree without lights? So I looked for a way to light up the tree. I contemplated drilling holes through the wood and sticking Christmas lights through the holes from the back, but I couldn’t bear to mar this beautiful wood. This copper LED light strand hides well behind the string, and it even comes with a remote to change the pattern of the dancing lights.

The wood I used has a history. I bought a long 1×10 of zebra wood seven years ago for a project that never happened. I cut it in six 15-inch pieces for the project, and then it sat for six years. During those six years, the wood dried out, and the light zebra stripes darkened to deep brown. Last year, we seamlessly joined three of those pieces together to make our guestbook sign-in board for our wedding. (Someday I may blog about that.) These last three pieces became the backdrop for this string-art tree. So the wood is not stained. It’s its natural color. Gorgeous, isn’t it?
How to make a string-art Christmas tree
SUPPLIES
TOOLS
DOWNLOAD
INSTRUCTIONS

1. Cut the 1×10 into three 15-inch pieces. Lightly sand with 220-grit sandpaper. Wipe off the dust. Apply Briwax to the wood with a rag to protect the wood. Wipe off the excess with a rag. I love how the Briwax refreshed that dry, old wood so beautifully.

2. Cut the 1×4 into two 26½ inch pieces. The purpose of these pieces of wood is twofold: 1) To easily connect the three front pieces of wood, and 2) to give enough space on the back for the battery pack for your lights. Sand the wood with 220 grit, wipe off the dust, and apply Briwax.

3. If your front wood is dark like mine (whether stained or natural), you’ll want to stain these pieces to match. Apply the stain with a rag, let sit according to instructions, then wipe it off. Apply a clear polyurethane coat to seal it and let dry. Mine took 48 hours to dry, so I wouldn’t recommend the sealer I bought. The stain/wood I used didn’t quite match the front pieces, but it was dark, which all I was going for.

4. Use bar clamps to clamp the front pieces of wood together end-to-end horizontally. Then clamp the back pieces to the back, insetting them one inch from the edges of the front pieces.

5. Download and print the free Christmas tree pattern on six sheets of paper. The pattern is designed for used with a piece (or pieces) of wood that measures 15 by 28½ inches. Using a craft knife, straight edge, and ruler, trim off at the line on the right side of page 1, 3, and 5. Then trim off at the top and bottom lines on page 3 and 4.

6. Tape the pattern together matching up the dots and lines as shown. On my printer, a couple of the sheets didn’t exactly match up, but they’re close enough.

7. Securely tape the pattern to the front of your newly assembled backer board.

8. Using a rotary tool and a 1/32-inch drill bit, pre-drill all the dots in the pattern where you will be hammering in a nail. If you don’t want ornaments, don’t drill those holes. Make sure you drill straight up and down. If your holes are crooked, your nails will be crooked. Pre-drilling prevents the wood from cracking, and it makes hammering the nails much easier and faster. When you’re done drilling, remove the paper pattern but save it for reference.

9. This is a tip I haven’t found in any other string-art tutorial, but it’s key: Use a nail holder to hammer in a nail in each pre-drilled hole. (See the supplies list for sources.) It holds the nail straight, it’s small enough to get in tight spaces, it keeps you from hammering your thumb, it speeds up the work significantly, and it automatically measures the perfect height of each nail for you. Just hammer down as far as you can, remove the nail holder, and, voilà, all your nails are straight and at the same height. For the ornament nails, don’t hammer them down all the way. I kept them about ⅛ inch taller.

When you’re done hammering the nails, it should look like this.

10. Starting at the bottom, wind the light strand around the outside of your pattern. Wind up one side of the tree, around the star, and back down the other side of the tree. You’ll have a little excess at the bottom, so keep wrapping until you run out.

11. Wind your string around the nails. It’s best to start at the star. Tie a knot, then start winding. Once you finish the star, move down the tree, going all the way from one side to the other (don’t go down half of the tree and back up the other half, like you did with the lights). I tried crochet string first. It was too thin for this project. Thin cotton yarn looks much better, and it hides the light-string wire better. Tie a tight knot at the end, and cut off the excess.

12. You’ll need to secure your battery pack to the back. My battery pack had a hanging loop on it, so the easiest solution was to pre-drill and hammer in two nails for it to hang on.

13. Hang the battery pack from the two nails, and tape up the slack so the cord doesn’t dangle below your tree.

12B. If your battery pack doesn’t have a hanging loop, here’s an alternate method (my husband’s idea): Make a pocket out of a metal hanger strap (used for plumbing). Using tin snips, cut one piece that wraps around the box horizontally and another that tucks under the first strap and secures at the bottom. Bend the strap using flat-nosed pliers.

13B. Make sure the horizontal piece is loose enough so you can slide out the battery pack and change the batteries. Pre-drill and screw the hanger strap onto the back of your wood between the backer pieces.

14. Pre-drill two holes at the top of your backer board for eye hooks. Mine are a little less than one inch from each end. Insert the eye hook, get it started by hand, then screw it in the rest of the way with an awl or screwdriver.

15. Using a vise and two screwdrivers, twist open one link of the decorative chain. Loop it through one eye hook, and use the screwdrivers to twist it closed. Make the chain as long as you wish, then repeat on the side. My tree is hanging from a picture rail. If you don’t have a picture rail, try using a decorative picture hanger.

16. If you’re making the advent calendar, hang your ornaments on the tree to make sure all is working properly. Then stow each ornament in their tin until it’s their day to appear.

17. Have fun playing with the remote and changing the cadence of your twinkling lights. Remember, the copper wire interferes with the signal, so you’ll have to aim the remote from the side.

Share this story
Reader Gallery
Made this project? Email your photo(s) to monica (at) craftynest (dot) com, and I’ll share your version here!





Great post thank you.
Great vision/idea and amazing work!!! Your unique creation is beautiful and inspiring. Thank you very very very much for choosing to share your idea and for creating such a great-n-thorough tutorial, your tips are a wonderful bonus. THANK YOU, appreciate your time and graciousness very much!
I don’t see the link to download the pattern.
Tracy – It’s the link under the word “DOWNLOAD” in the supplies list that says “Free string-art Christmas tree pattern.” Enjoy!