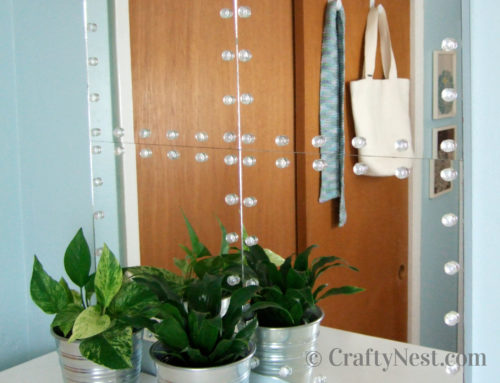
I saw this window frame at a salvage yard and coveted it for a few months before finally buying it. Instead of the opaque Plexiglass it came with, I inserted mirrors. I love mirrors because they can make a small space feel airy and bright. This one offers an added bonus: the illusion of an additional window. I planned to paint the frame, but decided that I like the natural, rustic look of it. Plus, it matches the wooden doors in my apartment.
Supplies
Tools
1. Choose one of the Plexiglass sheets, and make sure it fits in all nine openings.
2. Measure the piece of Plexiglass, and call glass stores for price quotes on mirrors the same size. Most glass stores in my area charge $10.50 per mirror, but I found one place that agreed to charge me $6.50 each. It pays to shop around—I saved about $40! You can usually pick them up 24 hours later.
3. Insert each mirror in an opening.
4. Using a utility knife, cut pieces of cardboard the same size as the mirrors. Protect your surface with spare sheets of cardboard or a self-healing mat. Depending on the thickness of your frame and the cardboard, you may need two pieces for each opening. My cardboard was thick, so I only used one piece each.
5. Insert the cardboard piece(s) on top of the mirror in each opening.
6. Tape along all the edges of the cardboard with paper mailing tape.
7. Drill pilot holes on the back, starting about one inch below the top of the frame. Screw on the keyhole fasteners. Make sure they’re facing the right way. I inserted washers under each fastener to give a little extra space underneath for the screw head to fit.
8. Adhere one felt pad at each of the bottom corners.
9. Measure the distance between the keyhole fasteners. Find the studs in your wall (by knocking or using a stud sensor), and drill drywall screws into the studs (or use a drywall anchor or molly bolt). Use a level and measure twice before drilling. Hang the mirror on the wall.
RSS feed for comments on this post · TrackBack URL
January 14, 2009 at 4:31 pm
Wow, this is fantastic and your directions are fabulous! I’ll be linking.
January 14, 2009 at 5:13 pm
LOVE IT! You’re so creative! I love looking at your blog, keep up the wonderful projects.
January 14, 2009 at 7:16 pm
What a great find! I love the idea of capturing light through a faux window…and the illusion of a much larger space is always a bonus!
January 15, 2009 at 7:01 am
Cute! Love the idea!
January 15, 2009 at 11:56 am
Great job!!!
I love it!!!!!!!!!!!!!!
January 15, 2009 at 4:39 pm
I picked up one of these too and turned it into a frame.
Take a look on my blog.
January 15, 2009 at 7:48 pm
I have a window grid just like this, the other day we were cleaning up the back storage space at work, (i work in a construction office) and they were going to toss it, because it had been ordered the wrong size to replace a broken one long long ago; I told them to save the space in the dumpster and put it in my car, SCORE! I already have mirror squares left over from a different project that i got really cheap at Lowes… I can do this project with out spending any money now because i can cut them to size on my own, just measure, use a ruler, and mark the edge with a marker, then cut like you do glass for stained glass projects. Glass cuts very easy. Thanks for posting this at the right time. i was thinking about maybe doing that, but i wasn’t sure how it would turn out, after seeing the photo of yours that is totally what i am going to do with mine. Thanks!
January 17, 2009 at 11:48 am
I love this idea! What a great way to add the illusion of a bigger room. You can make so much from salvaged things. Don’t you just love shopping there?
March 24, 2009 at 5:26 pm
There is much easier way. If you find a window with the glass still in it, Krylon makes a spray product that silvers the back and turns it into mirror glass. It’s called Krylon Looking Glass – google it for sources.
I’ve found that if you ignore the directions and DON’T clean the glass, or even deliberately dirty it, and then build up the coating in several light and very uneven coats, you can passably mimic the way antique mirrors darken and wear unevenly. You can even add a spritz or two of dark grey paint between coats to mimic those antique mercury spots. It’s fun to experiment, and if you hate it, you can scrape it off. Once you have it the way you want it, there’s a sealer coat that makes it more durable. I hung mine outdoors, and they lasted through four Maine winters before a really big windstorm tore them off – but the shards still looked pretty!
March 24, 2009 at 6:11 pm
Great tip, Jenn. Thanks for sharing!
May 27, 2009 at 6:23 am
Wow, I love this – what a great idea to open up a room!
May 3, 2011 at 4:51 pm
THIS is awesome. I completely love this idea. I can’t wait to find a window frame to try it with. I am so, so, so glad I found this site.
June 29, 2011 at 7:17 am
I’m moving furniture today, Husband will love to fill the holes after I move that mirror?????