DIY thrift-store plate mirrors
![hero-thrift-store-plate-mirrors-crafty-nest Three artichoke plates with mirrors hanging above a dresser, photo](https://i0.wp.com/www.craftynest.com/wp-content/uploads/2020/09/hero-thrift-store-plate-mirrors-crafty-nest-scaled.jpg?resize=1200%2C1600&ssl=1)
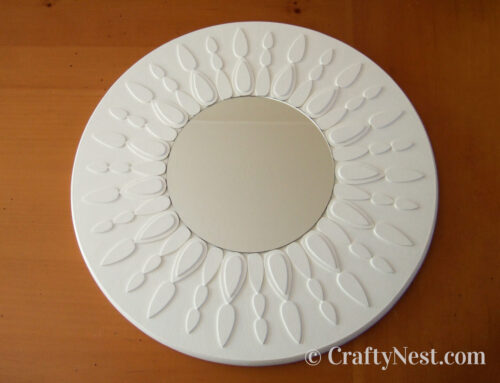
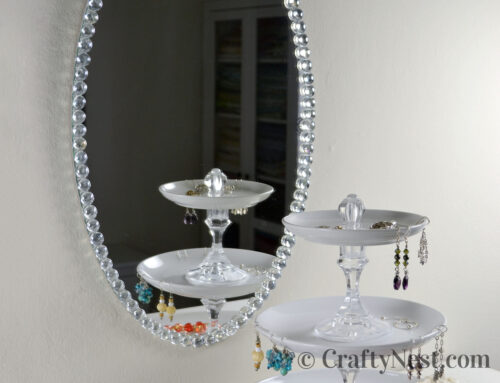
Happy Earth Day everyone! I found these artichoke plates at a thrift store while hunting for dishes with which to make cake stands. I loved the flower shape of them so much that I bought them all. I have plans for the rest, but these three were destined to become mirrors. As a friend pointed out, they could be cute in a little girl’s room: painted, glittered, with a fake butterfly attached. Which reminds me of Heika’s flowers. (This post contains affiliate links. If you use these links to buy something, I may earn a small commission. You can read my full disclosure here.)
![DSCF4113-thrift-store-plate-mirrors-crafty-nest Supplies to make the mirrors, photo](https://i0.wp.com/www.craftynest.com/wp-content/uploads/2020/09/DSCF4113-thrift-store-plate-mirrors-crafty-nest.jpg?resize=500%2C375&ssl=1)
How to make mirrors out of plates
SUPPLIES
INSTRUCTIONS
![DSCF4117-thrift-store-plate-mirrors-crafty-nest Apply glue to mirror, photo](https://i0.wp.com/www.craftynest.com/wp-content/uploads/2020/09/DSCF4117-thrift-store-plate-mirrors-crafty-nest.jpg?resize=500%2C375&ssl=1)
1. Apply a thin bead of glue to the outer edge of the back of the mirror.
![DSCF4120-thrift-store-plate-mirrors-crafty-nest Press mirror onto plate, photo](https://i0.wp.com/www.craftynest.com/wp-content/uploads/2020/09/DSCF4120-thrift-store-plate-mirrors-crafty-nest.jpg?resize=500%2C375&ssl=1)
2. Place the mirror in the center of the plate. Press down. Let the glue set overnight. If you want the mirrors to be removable, try mounting putty instead (found at office supply stores).
![DSCF4121-thrift-store-plate-mirrors-crafty-nest Attach plate hanger, photo](https://i0.wp.com/www.craftynest.com/wp-content/uploads/2020/09/DSCF4121-thrift-store-plate-mirrors-crafty-nest.jpg?resize=500%2C375&ssl=1)
3. Attach the plate hanger to the back of the plate.
![DSCF4131-thrift-store-plate-mirrors-crafty-nest Hang with 3M sawtooth picture hangers, photo](https://i0.wp.com/www.craftynest.com/wp-content/uploads/2020/09/DSCF4131-thrift-store-plate-mirrors-crafty-nest.jpg?resize=500%2C375&ssl=1)
4. To hang them, you can use the included hook and nail, or use 3M sawtooth picture hangers like I did. I chose the 3M option because I didn’t want to put holes in the wall.
![feature-thrift-store-plate-mirrors-crafty-nest Three artichoke plates with mirrors, photo](https://i0.wp.com/www.craftynest.com/wp-content/uploads/2020/09/feature-thrift-store-plate-mirrors-crafty-nest.jpg?resize=1200%2C900&ssl=1)
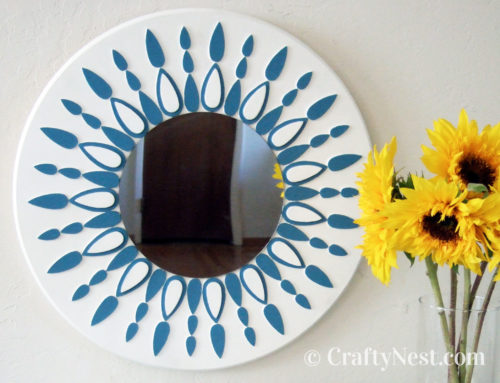
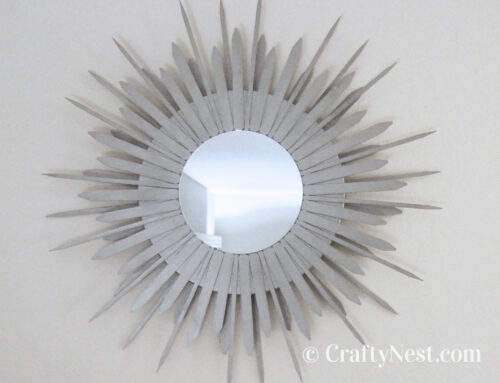
5. Choose your arrangement, and hang them on the wall. Easy peasy.
![pinterest-thrift-store-plate-mirrors-crafty-nest Crafty Nest thrift store plate mirros Pinterest photo](https://i0.wp.com/www.craftynest.com/wp-content/uploads/2020/09/pinterest-thrift-store-plate-mirrors-crafty-nest.jpg?resize=600%2C900&ssl=1)
Share this story
Reader Gallery
Made this project? Email your photo(s) to monica (at) craftynest (dot) com, and I’ll share your version here!
Leave A Comment