
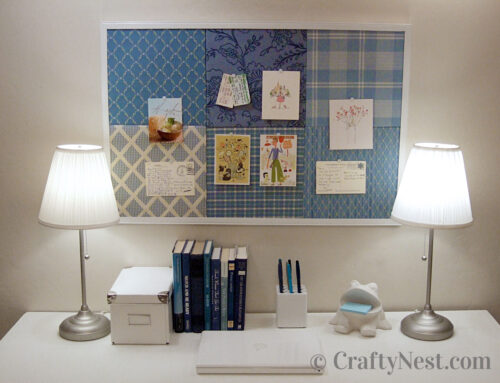
Ugly plastic mirror = DIY bulletin board

One of my friends referred to this as the “ugly mirror.” Another friend said, “Whatever you paid for it, you paid too much.” I get more excited about a project when I hear comments like that because I think, “Just wait till they see what I do with it. Mwahaha!” For the record, I paid $9 for this plastic thrift-store find. I used leftover materials from three previous projects: shuttered bulletin board, spa slippers, and pants-hanger frames. I only had to buy fabric, paint, and ribbon. Now I just need to find a use for a chipped oval mirror. (This post contains affiliate links. If you use these links to buy something, I may earn a small commission. You can read my full disclosure here.)

How to make a framed bulletin board
SUPPLIES
TOOLS
INSTRUCTIONS

1. First disassemble the frame or mirror. Using a marker, trace the mirror onto the homasote board.

2. Cut it out using a coping saw. Homasote is basically pressed paper, so it’s easy to cut. It just makes a bit of a mess.

3. Clean the frame free of dust. Cover your work surface and spray on the paint. It will take a few coats from several angles to cover something as ornate as this. Let dry several hours.

4. Trace the mirror onto the batting and cut out. Sandwich the batting between the homasote and fabric, lining up the edges.

5. Pull the fabric tight and staple once at each of the four “corners.” Then gather and staple the fabric in between. Trim excess fabric.

6. Replace the back piece with screws. (I know that’s a funny looking screwdriver, but it works great. Hand-me-down from my dad.)

7. Tie one end of the ribbon around a screw on each side.

8. For that extra touch, use white furniture tacks instead of thumb tacks. I love how tacks along with houndstooth fabric and puffy batting give it an upholstered look.


9. Remove the screw from the drawer pull and replace it with the hanger bolt. Screw it in as tightly as you can. Drill a hole in the wall and screw in your picture hanger. If your pin board is heavy, you’ll need to screw the picture hanger into a stud or use a molly bolt.
10. Hang the ribbon from the picture hanger, and pin up your favorite ephemera.

Share this story
Reader Gallery
Made this project? Email your photo(s) to monica (at) craftynest (dot) com, and I’ll share your version here!


Cat made this bulletin board out of an oval mirror. Looks great, Cat!

Leave A Comment