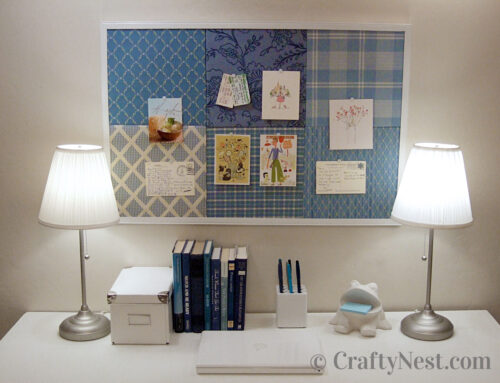
“First rule in government spending: Why build one when you can have two at twice the price?” Any guesses what movie that line is from? I loved these salvaged window frames so much, I bought both. This one was a little worse for wear, but it was nothing wood glue and a fresh paint job couldn’t cure. I got the (free!) wallpaper samples from FabMo, a volunteer effort collecting discontinued fabric samples from the San Francisco design community. Thanks, Hannah and Jonathan!
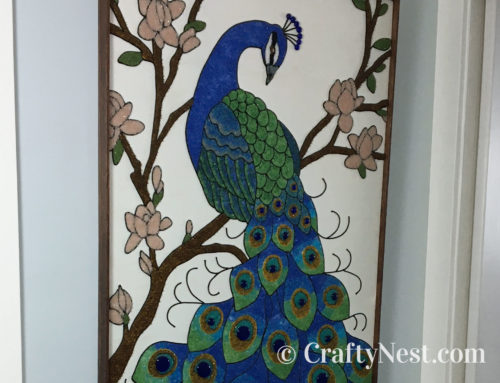
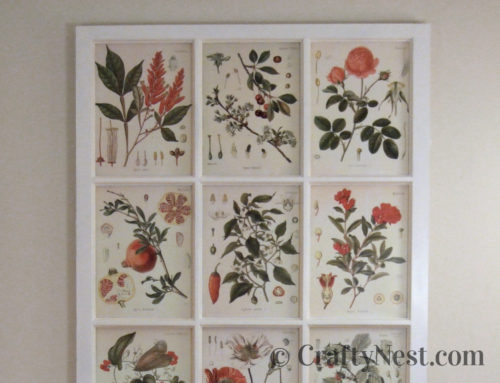
Supplies
Tools
1. First, repair any broken pieces with wood glue and nails. Clamp them together until the glue dries. Clean, sand any imperfections, and dust the window frame.
2. Prime and paint the window frame. I used spray primer, but decided it was too windy outside for spray painting, so I applied the paint color by hand. I’ve become a fan of sponge paint brushes for painting wood. They give a smoother finish, and allow more control over the flow of paint. Let dry several hours.
3. Measure the openings, then cut 18 pieces of cardboard (two for each opening).
4. Choose your wallpaper samples and arrangement.
5. Using one of your cardboard pieces as a template, cut the wallpaper samples to size. A utility knife, ruler, and self-healing mat made this part easy.
6. Adhere each wallpaper sample to a piece of cardboard with spray adhesive.
7. Insert each wallpaper-covered piece of cardboard into the window frame. Then insert another piece of cardboard behind each. Tape in place with masking tape. Not much tape is needed. The snug fit of the cardboard (plus the wall) will keep them in place.
8. Follow steps 7, 8, and 9 right here to finish this project.
RSS feed for comments on this post · TrackBack URL
June 4, 2009 at 2:08 am
Such a cute idea – I think I’ll look at discarded windows a bit differently from now on! Good tip also on the sponge paint brush, thank you!
June 4, 2009 at 4:27 am
Once again, lovely and inspiring!
June 4, 2009 at 4:31 am
This is amazing! It’s just beautiful…and great placment behind the bed too.
June 4, 2009 at 5:14 am
i looks awesome and i especially love that you hung it over the bed. very nice idea.
June 4, 2009 at 5:53 am
This is great! Fabulous idea and I love the wallpaper samples that you selected. Well Done!
June 4, 2009 at 6:34 am
The movie is Contact, right?
June 4, 2009 at 6:50 am
That looks great! Similar look to something I believe I saw in the Ballard Design catalog. I love that you included instructions and step-by-step pictures.
June 4, 2009 at 7:42 am
Fabulous! It looks wonderful! Thanks for a great diy :)
June 4, 2009 at 8:46 am
This is AMAZING. I love this!!
June 4, 2009 at 11:47 am
Very pretty!
June 4, 2009 at 12:39 pm
I love your blog!! I was just looking through your previous posts and they are certainly inspiring and motivating. One question though, where do you find all your treasures to restore? I have a hard time because there are just not very many consignment shops or good wills around where I live.
June 4, 2009 at 12:44 pm
Erin – You got it! The quote is from Contact.
June 4, 2009 at 12:52 pm
Those wallpaper samples are gorgeous! Great idea!
June 4, 2009 at 1:37 pm
Love this. The wallpaper selections in particular are gorgeous.
June 4, 2009 at 3:23 pm
That looks so pretty! And I was just talking about that quote the other day with a friend- it’s from Contact!
June 4, 2009 at 7:34 pm
That bit from Contact is the very definition of deus ex machina. “Guess what! We built another zillion dollar gizmo on the other side of the world and nobody ever noticed!” Yeah right.
June 4, 2009 at 7:41 pm
Absolutely fantastic! I love that the wallpaper on the upper right is the odd girl out – very edgy.
June 4, 2009 at 8:08 pm
It’s beautiful, i love it.
June 4, 2009 at 8:15 pm
Incredible.
June 4, 2009 at 10:28 pm
Love it. Thanks for sharing your great ideas. Looking forward to doing some redecorating!
June 4, 2009 at 11:07 pm
John – You’re so right. That occurred to me the more I thought about the Contact quote this week. Oh well. I still liked the movie.
Laura – I’m glad you noticed—and liked—that touch.
June 4, 2009 at 11:23 pm
How absolutely lovely. I am so inspired by that use of an old window frame. Fabulous !
June 5, 2009 at 3:21 pm
This is so cute. Great job. I love it behind the bed. Very nice colors on the wallpaper.
June 7, 2009 at 9:47 pm
OOOOOHHH! This is so great! I have a little window frame that has been kicking around for a few years now. This idea is perfect! Love the colors!
June 8, 2009 at 12:15 pm
This is beautiful. I linked to it at somedaycrafts.blogspot.com
June 9, 2009 at 10:40 am
This makes me want to run over to Habitat for Humanity & greedily snatch up all the window frames !
June 9, 2009 at 6:44 pm
I’ve given you an award, to receive it visit my site.
Anna
June 13, 2009 at 11:33 am
Oh such a clever idea!! My mom has all these old windows in her barn and we have been dying to do something with them. Much better than the idea of painting them. Thanks!!
June 14, 2009 at 10:54 pm
I need to do this. I have so many random pieces of paper and this would be a great way to use up.
July 21, 2009 at 3:04 pm
This is such a great idea. I saw it on Decorology and mentioned it on our site. Thought it’d also be fun to fill it with Graham & Brown’s new Frames wallpaper. Thanks for the step-by-step!
September 19, 2009 at 6:42 am
just FYI if you go to a store that has walpaper all the sample books expire and they will often give them away for free!! no need to pay for samples
Rehab Rehash said,
November 8, 2009 at 12:17 pm
[...] HomeDIY: Painted thrift store cabinet ~ Centsational GirlRefashioned dining table ~ Poppies at PlaySalvaged window = walllpaper frames ~ Crafty NestSide table refashion: Poppies at PlayBoring pantry cabinet makeover ~ Fireflies and [...]
November 24, 2009 at 10:26 am
I am soooooo HAPPY to see you posted this…. I have 3 of these same frames out in my garage now, and I knew I wanted to do something so different and unique with them… As of right now, they are Black in color and have the mirrors in them, I too have mirrors in many places in my Home, so I too wanted to remove the mirrors, and put something different to use as a art piece in places that need something there…. Thank you so very much for inspiring me to do this!!!!
April 6, 2010 at 6:41 am
Wow! its just the perfect idea what one can do with a boring piece of window pane. Thanks for the great step by step instruction.
May 3, 2011 at 4:46 pm
This is so cute! I love it.
Hmm… If you found a landscape painting (or reproduction) I bet an old window frame could be used to frame it… kind of like having an actual window hanging on your wall. I suppose you’d have to find a picture and frame that fit each other, though, so it probably wouldn’t work very well.
Ustvarjalne povezave « Tinka's Stuff said,
November 3, 2011 at 3:43 am
[...] Okno – slika. S pridihom scrapbookinga. [...]
October 20, 2012 at 2:21 pm
this is great do you think I could use material (quilted also)?
April 24, 2013 at 1:28 am
Hello, I think your blog might be having browser compatibility issues.
When I look at your blog in Opera, it looks fine but when opening in Internet Explorer,
it has some overlapping. I just wanted to give you a quick heads up!
Other then that, fantastic blog!